Here’s a list of steps to get octoprint to run within a container on Windows. I happen to have a windows system running next to my ender so instead of infinitely waiting for a raspberry pi I decided to run octoprint in a container within windows – if possible. Using Debian was a challenge, but I prefer it over Ubuntu, so I took the extra time to figure it out. Enjoy!
Get USB serial device into Debian
PowerShell (Admin)
PS C> winget install --interactive --exact dorssel.usbipd-winDebian:
$ sudo apt-get install usbutils hwdata usbipPowershell Admin:
PS C> usbipd wsl list
BUSID  VID:PID    DEVICE                                                        STATE
1-1    046d:c545  USB Input Device                                              Not attached
1-2    2357:0138  TP-Link Wireless MU-MIMO USB Adapter                          Not attached
1-4    1bcf:28c4  FHD Camera, FHD Camera Microphone                             Not attached
1-5    1a86:7523  USB-SERIAL CH340 (COM4)                                       Not attached
1-13   046d:c52b  Logitech USB Input Device, USB Input Device                   Not attached

PS C> usbipd wsl attach --busid 1-4
usbipd: info: Using default distribution 'Debian'.

PS C> usbipd wsl attach --busid 1-5
usbipd: info: Using default distribution 'Debian'.

PS C> usbipd wsl list
BUSID  VID:PID    DEVICE                                                        STATE
1-1    046d:c545  USB Input Device                                              Not attached
1-2    2357:0138  TP-Link Wireless MU-MIMO USB Adapter                          Not attached
1-4    1bcf:28c4  FHD Camera, FHD Camera Microphone                             Attached - Debian
1-5    1a86:7523  USB-SERIAL CH340 (COM4)                                       Attached - Debian
1-13   046d:c52b  Logitech USB Input Device, USB Input Device                   Not attached
1-23   0bda:9210  USB Attached SCSI (UAS) Mass Storage Device                   Not attached
Debian:
# lsusb
Bus 002 Device 001: ID 1d6b:0003 Linux Foundation 3.0 root hub
Bus 001 Device 002: ID 1bcf:28c4 Sunplus Innovation Technology Inc. FHD Camera Microphone
Bus 001 Device 001: ID 1d6b:0002 Linux Foundation 2.0 root hub

# python3 -m serial.tools.miniterm


--- Available ports:
---  1: /dev/ttyUSB0         'USB Serial'
docker-compose.yml
version: '2.4'
services:
octoprint:
image: octoprint/octoprint
restart: unless-stopped
ports:
- 80:80
devices:
# use `python3 -m serial.tools.miniterm` , this requires pyserial
# - /dev/ttyACM0:/dev/ttyACM0
# - /dev/video0:/dev/video0
- /dev/ttyUSB0
volumes:
- octoprint:/octoprint
#environment:
# - ENABLE_MJPG_STREAMER=true
####
# uncomment if you wish to edit the configuration files of octoprint
# refer to docs on configuration editing for more information
####
#config-editor:
# image: linuxserver/code-server
# ports:
# - 8443:8443
# depends_on:
# - octoprint
# restart: unless-stopped
# environment:
# - PUID=0
# - GUID=0
# - TZ=America/Chicago
# volumes:
# - octoprint:/octoprint
volumes:
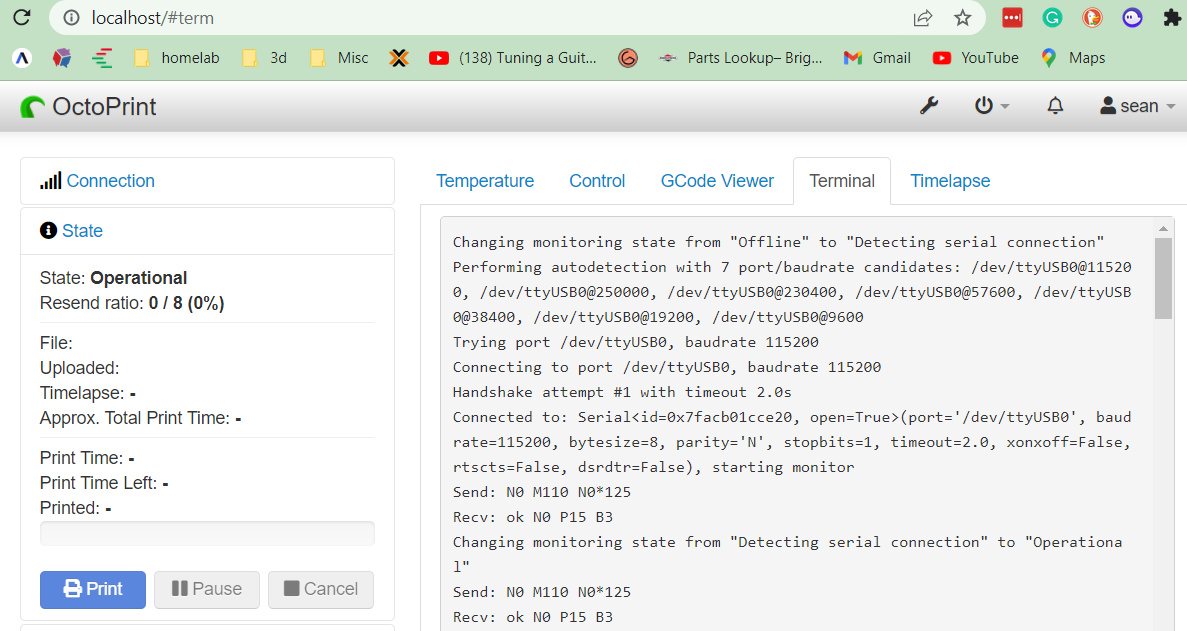
octoprint:Success!