How I’m Winning with Windows 11 (without the nags)

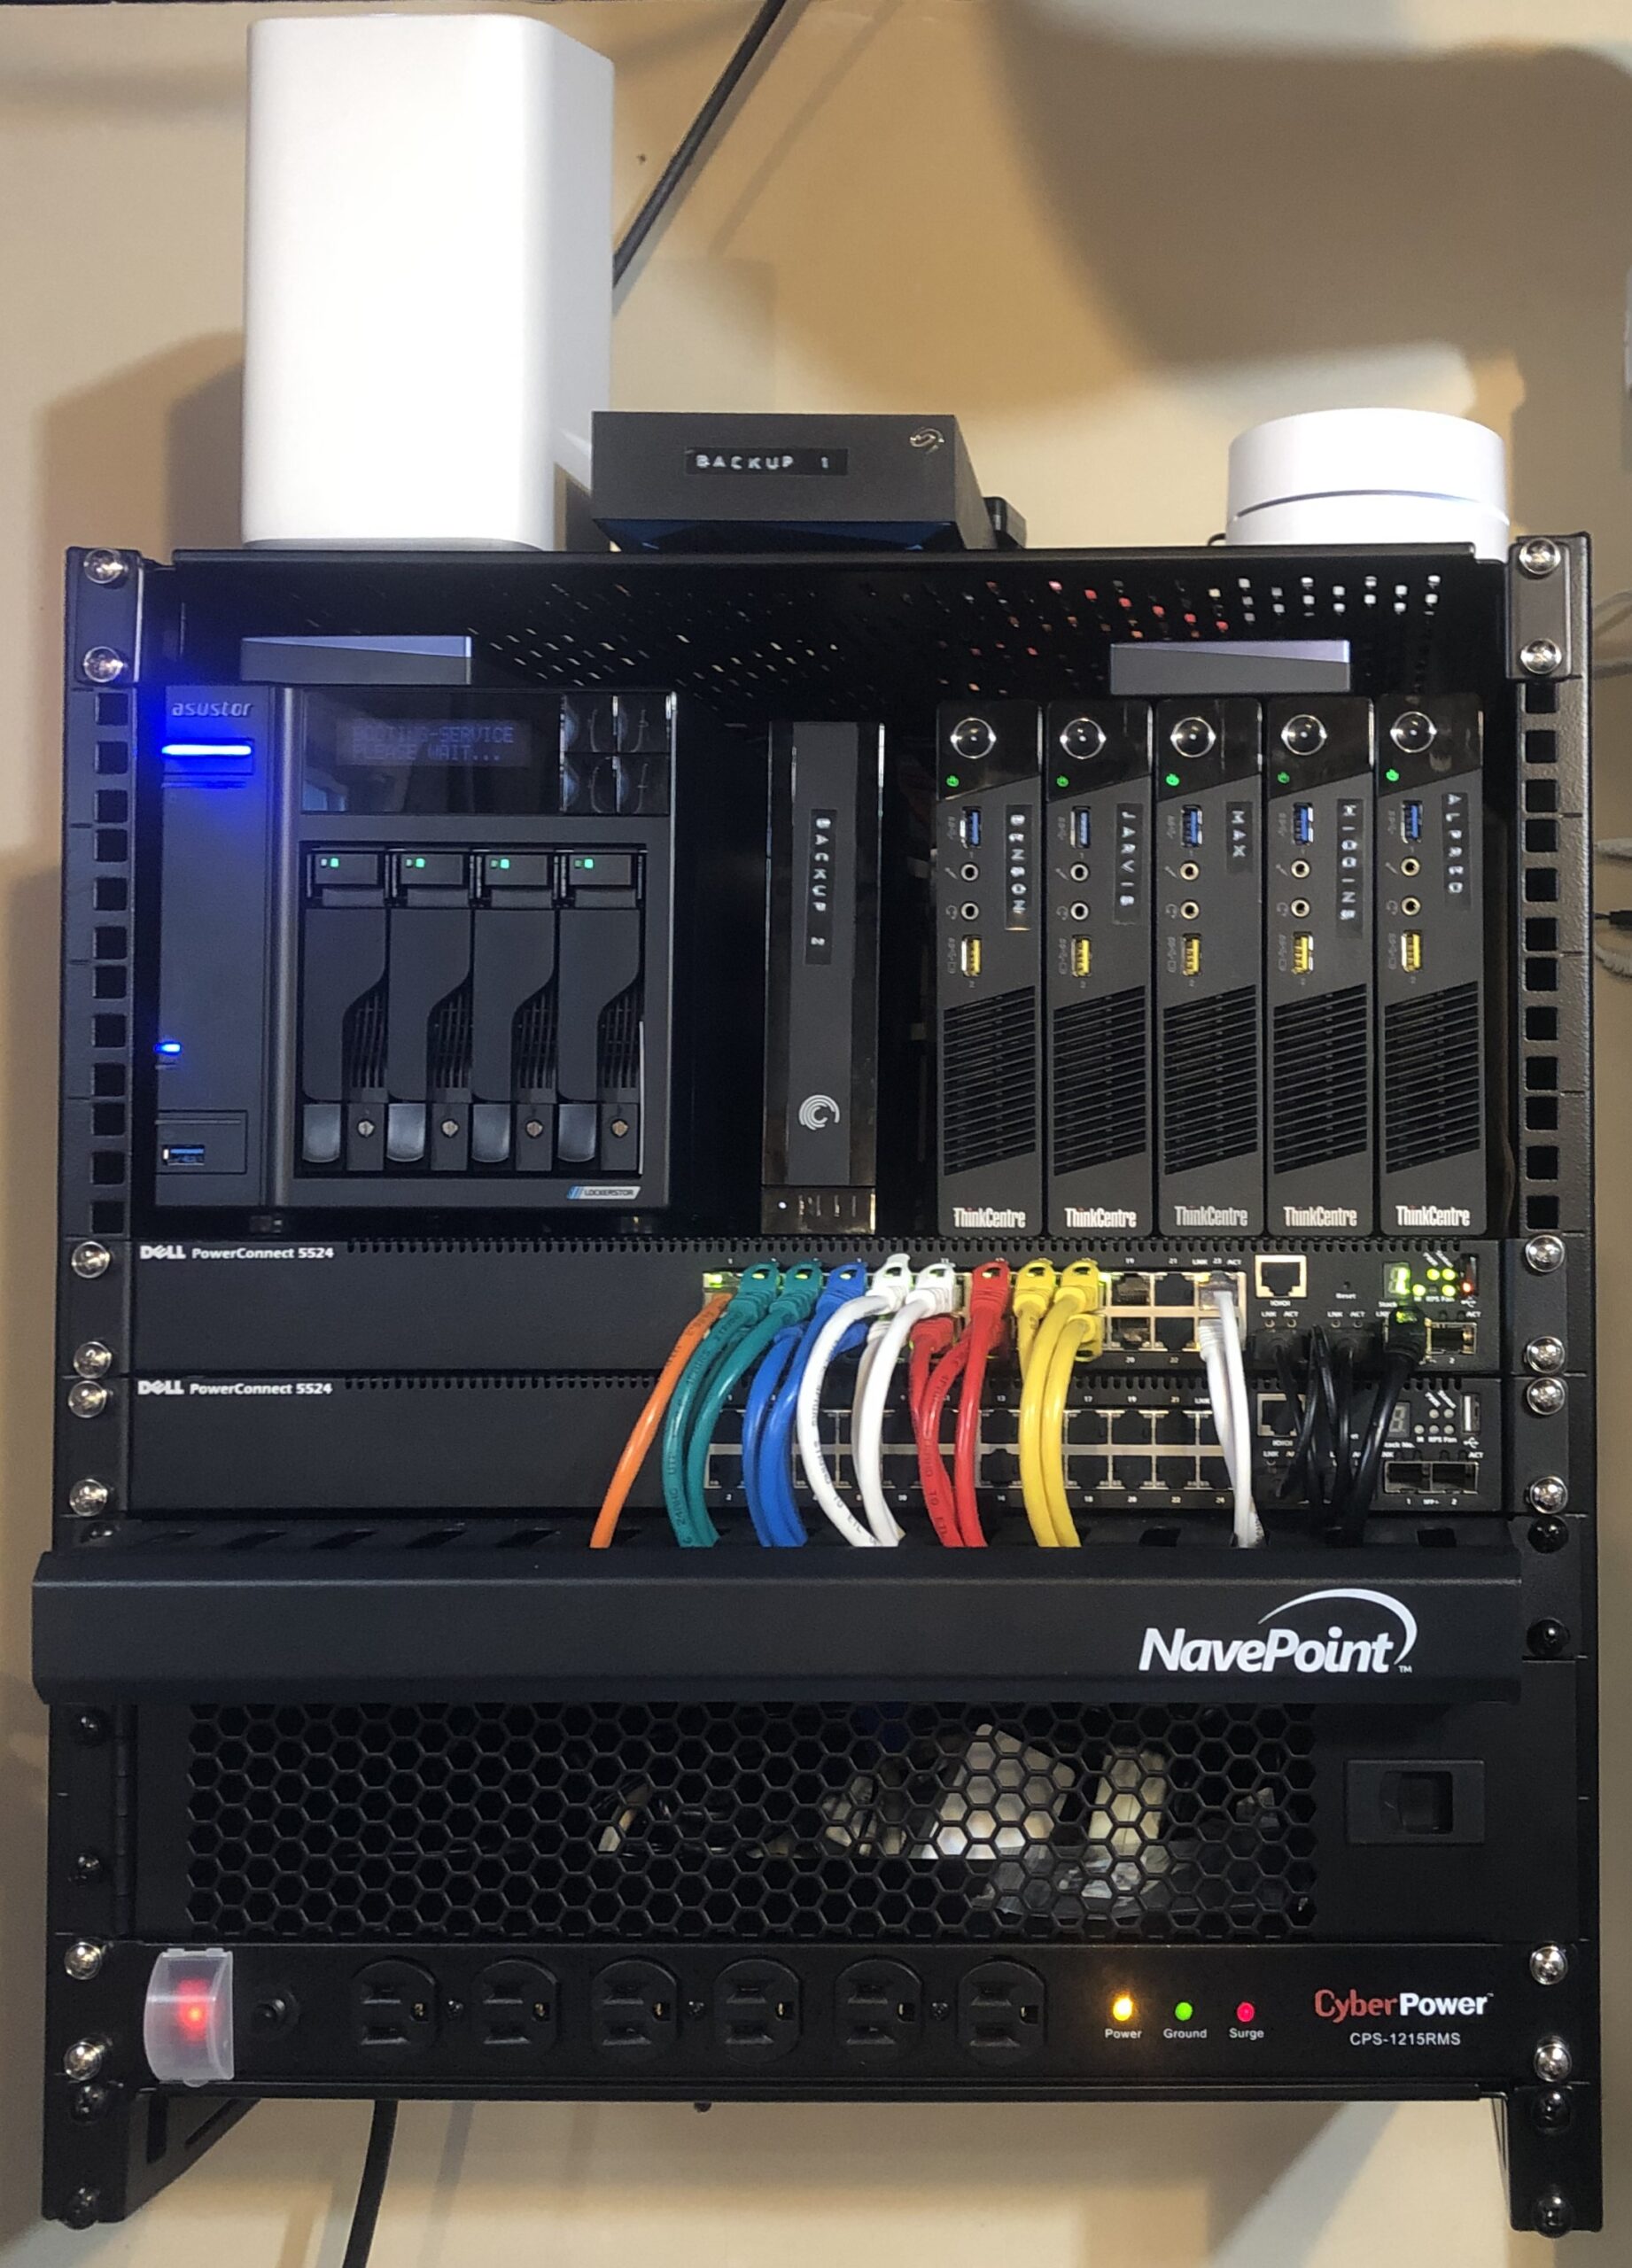
Windows 11 is ideal for multifunctional use – Office, Games, WSL, HW Options Kazoo – but the built-in defaults slow me down and get sooo annoying. These tweaks make it fast, clean, and predictable:

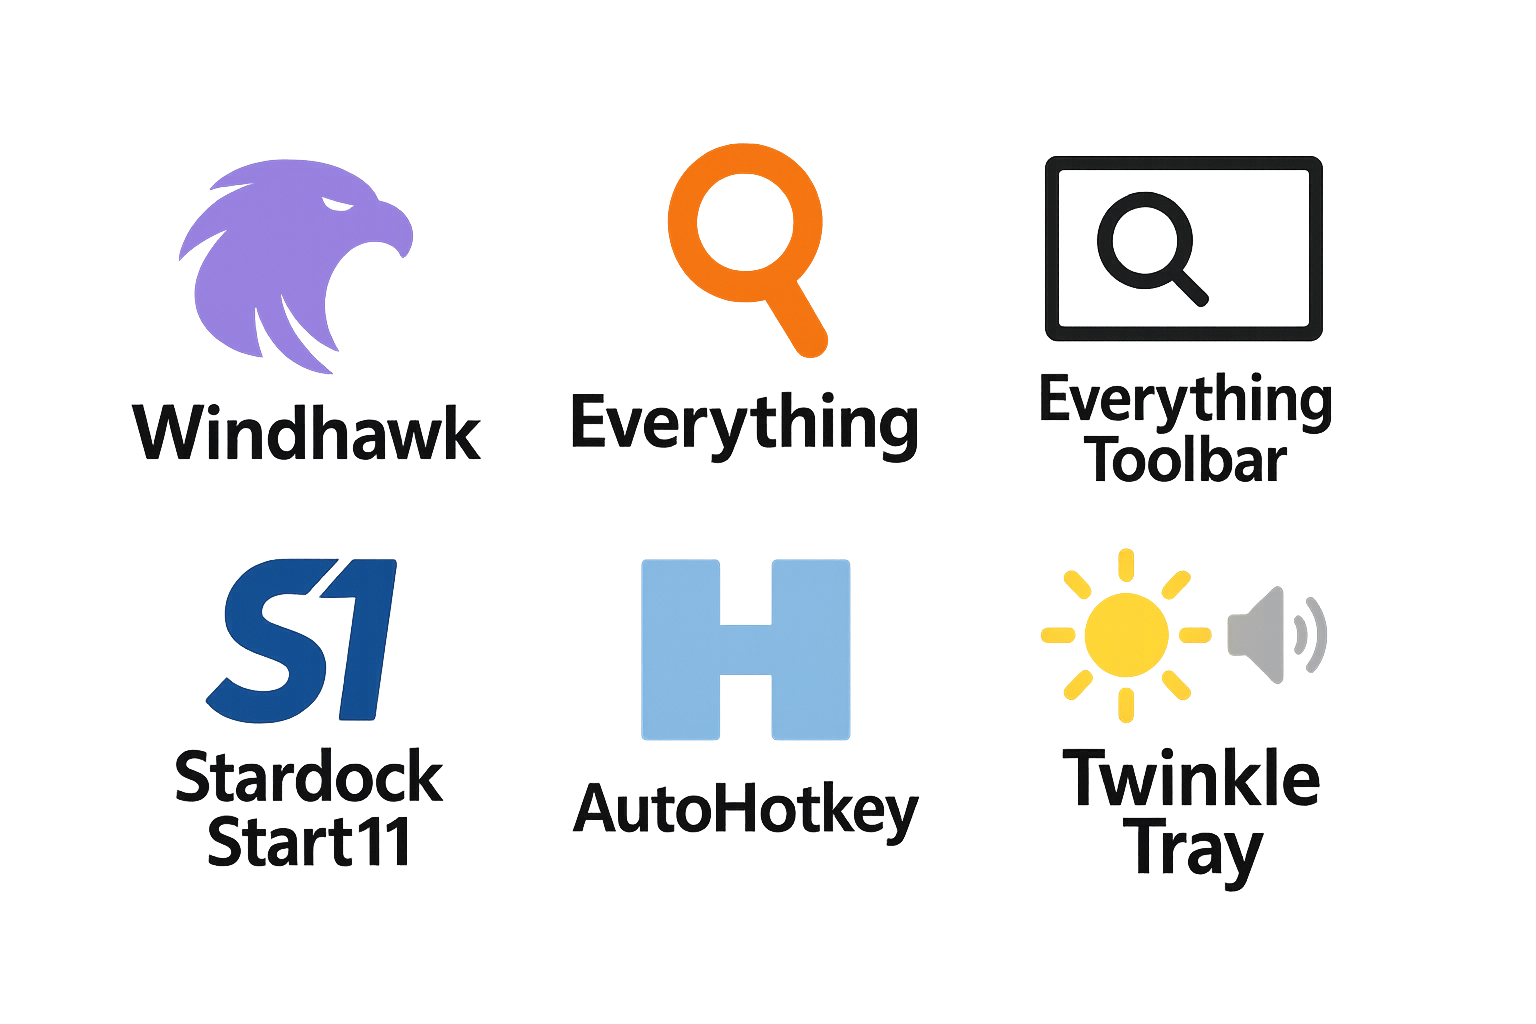
  • Windhawk mods for the stuff Microsoft won’t expose:
    Taskbar Clock Customization (rich clock/date formats), Better File Sizes in Explorer (human-readable sizes), and Taskbar Icon Spacing/Size (tight or roomy as you like). Windhawk

  • Everything + Everything Toolbar for instant file search from the taskbar/start area. Windows Search sleeps; Everything sprints. Voidtools

  • Start11 to restore a sane Start Menu—and wire it to Everything so Start menu searches are local, fast, and ad-free. Stardock

  • AutoHotkey to supercharge virtual desktops:
    ALT+1..9 jumps to a desktop; SHIFT+ALT+1..9 moves the focused window there. It’s a perfect “almost-tiling” workflow without the rigidity of a tiling WM. My keymaps live here: https://github.com/ske5074/windows-desktop-switcher . AutoHotkey  (Be sure to use the 1.x version of AutoHotKey)

  • Twinkle Tray for one-click monitor brightness (and quick volume), right from the tray—especially handy with multi-monitor setups. Twinkle Tray

Net result: a quiet, fast Windows 11 desktop that works the way I do—no Edge promos, no Start menu fluff, and muscle-memory moves between clean, purpose-built desktops.


References / Links

Updated Homelab using M910Qs and P320s

Recently, I gave my homelab a fresh upgrade by adding Lenovo ThinkCentre M910Q Tiny systems and a few P320s equipped with Nvidia Quadro P600 video cards. These systems are compact yet powerful, documented to support up to 32GB of RAM each—but with a bit of tweaking, they can handle an impressive 64GB! They might not be the most powerful setups out there, but with their small form factor and affordability, they make fantastic little Proxmox machines, offering big potential in a small footprint.

Used PC4-21300 2666MHz CL19 32GB SODIMMs for memory,  with Intel Core I7 CPUs

Octoprint container in Debian Windows WSL 2 and Docker Desktop

Here’s a list of steps to get octoprint to run within a container on Windows. I happen to have a windows system running next to my ender so instead of infinitely waiting for a raspberry pi I decided to run octoprint in a container within windows – if possible. Using Debian was a challenge, but I prefer it over Ubuntu, so I took the extra time to figure it out. Enjoy!

Get USB serial device into Debian

PowerShell (Admin)

PS C> winget install --interactive --exact dorssel.usbipd-win

Debian:

$ sudo apt-get install usbutils hwdata usbip

Powershell Admin:

PS C> usbipd wsl list
BUSID  VID:PID    DEVICE                                                        STATE
1-1    046d:c545  USB Input Device                                              Not attached
1-2    2357:0138  TP-Link Wireless MU-MIMO USB Adapter                          Not attached
1-4    1bcf:28c4  FHD Camera, FHD Camera Microphone                             Not attached
1-5    1a86:7523  USB-SERIAL CH340 (COM4)                                       Not attached
1-13   046d:c52b  Logitech USB Input Device, USB Input Device                   Not attached

PS C> usbipd wsl attach --busid 1-4
usbipd: info: Using default distribution 'Debian'.

PS C> usbipd wsl attach --busid 1-5
usbipd: info: Using default distribution 'Debian'.

PS C> usbipd wsl list
BUSID  VID:PID    DEVICE                                                        STATE
1-1    046d:c545  USB Input Device                                              Not attached
1-2    2357:0138  TP-Link Wireless MU-MIMO USB Adapter                          Not attached
1-4    1bcf:28c4  FHD Camera, FHD Camera Microphone                             Attached - Debian
1-5    1a86:7523  USB-SERIAL CH340 (COM4)                                       Attached - Debian
1-13   046d:c52b  Logitech USB Input Device, USB Input Device                   Not attached
1-23   0bda:9210  USB Attached SCSI (UAS) Mass Storage Device                   Not attached

Debian:

# lsusb
Bus 002 Device 001: ID 1d6b:0003 Linux Foundation 3.0 root hub
Bus 001 Device 002: ID 1bcf:28c4 Sunplus Innovation Technology Inc. FHD Camera Microphone
Bus 001 Device 001: ID 1d6b:0002 Linux Foundation 2.0 root hub

# python3 -m serial.tools.miniterm


--- Available ports:
---  1: /dev/ttyUSB0         'USB Serial'

docker-compose.yml

version: '2.4'

services:
  octoprint:
    image: octoprint/octoprint
    restart: unless-stopped
    ports:
      - 80:80
    devices:
    # use `python3 -m serial.tools.miniterm` , this requires pyserial
    #  - /dev/ttyACM0:/dev/ttyACM0
    #  - /dev/video0:/dev/video0
      - /dev/ttyUSB0
    volumes:
     - octoprint:/octoprint
    #environment:
    #  - ENABLE_MJPG_STREAMER=true

  ####
  # uncomment if you wish to edit the configuration files of octoprint
  # refer to docs on configuration editing for more information
  ####

  #config-editor:
  #  image: linuxserver/code-server
  #  ports:
  #    - 8443:8443
  #  depends_on:
  #    - octoprint
  #  restart: unless-stopped
  #  environment:
  #    - PUID=0
  #    - GUID=0
  #    - TZ=America/Chicago
  #  volumes:
  #    - octoprint:/octoprint

volumes:
  octoprint:

Success!

Docker volume backup and restore the easy way.

I haven’t had to move docker volumes around in a few years, but I finally had the need today. As usual, I searched for the process, knowing that most examples are… well… not very good. Well, as I almost resorted to pulling a manual job using ubuntu, I found a great write-up by Jarek Lipski on Medium. Here’s how you backup using alpine and tar. Also, make sure you “docker stop” the containers that use the volume, so you get a consistent backup.

Which containers use a volume?

docker ps -a --filter volume=[some_volume]

Backup using an alpine image with tar:

docker run --rm -v [some_volume]:/volume -v /tmp:/backup alpine tar -cjf /backup/[some_archive].tar.bz2 -C /volume ./

Restore:

docker run --rm -v [some_volume]:/volume -v /tmp:/backup alpine sh -c "rm -rf /volume/* /volume/..?* /volume/.[!.]* ; tar -C /volume/ -xjf /backup/[some_archive].tar.bz2"

Backup using loomchild/volume-backup

I love that Jarek also created an image to simplify further the process called loomchild/volume-backup. Here’s how the image works:

docker run -v [volume-name]:/volume -v [output-dir]:/backup --rm loomchild/volume-backup backup [archive-name]

Restore:

docker run -v [volume-name]:/volume -v [output-dir]:/backup --rm loomchild/volume-backup restore [archive-name]

What’s great is this method allows inline copying of a volume from one system to another using ssh. Here’s an example Jarek provides:

docker run -v some_volume:/volume --rm --log-driver none loomchild/volume-backup backup -c none - |\
     ssh user@new.machine docker run -i -v some_volume:/volume --rm loomchild/volume-backup restore -c none -

Add HEIC support to nextcloud

From https://eplt.medium.com/5-minutes-to-install-imagemagick-with-heic-support-on-ubuntu-18-04-digitalocean-fe2d09dcef1

sudo sed -Ei 's/^# deb-src /deb-src /' /etc/apt/sources.list
sudo apt-get update
sudo apt-get install build-essential autoconf libtool git-core
sudo apt-get build-dep imagemagick libmagickcore-dev libde265 libheif
cd /usr/src/ 
sudo git clone https://github.com/strukturag/libde265.git  
sudo git clone https://github.com/strukturag/libheif.git 
cd libde265/ 
sudo ./autogen.sh 
sudo ./configure 
sudo make  
sudo make install 
cd /usr/src/libheif/ 
sudo ./autogen.sh 
sudo ./configure 
sudo make  
sudo make install 
cd /usr/src/ 
sudo wget https://www.imagemagick.org/download/ImageMagick.tar.gz 
sudo tar xf ImageMagick.tar.gz 
cd ImageMagick-7*
sudo ./configure --with-heic=yes 
sudo make  
sudo make install  
sudo ldconfig
sudo apt install php-imagick
cd /usr/src/ 
wget http://pecl.php.net/get/imagick-3.4.4.tgz
tar -xvzf imagick-3.4.4.tgz
cd imagick-3.4.4/
apt install php7.2-dev
phpize
./configure
make
make install
sudo phpenmod imagick

A restart of apache2 should finish the job. Check with the phpinfo() call…

sudo systemctl restart apache2
php -r 'phpinfo();' | grep HEIC
You should see:
ImageMagick supported formats => 3FR, 3G2, 3GP, A, AAI, AI, ART, ARW, AVI, AVS, B, BGR, BGRA, BGRO, BIE, BMP, BMP2, BMP3, BRF, C, CAL, CALS, CANVAS, CAPTION, CIN, CIP, CLIP, CMYK, CMYKA, CR2, CRW, CUBE, CUR, CUT, DATA, DCM, DCR, DCRAW, DCX, DDS, DFONT, DJVU, DNG, DPX, DXT1, DXT5, EPDF, EPI, EPS, EPS2, EPS3, EPSF, EPSI, EPT, EPT2, EPT3, ERF, EXR, FAX, FILE, FITS, FLV, FRACTAL, FTP, FTS, G, G3, G4, GIF, GIF87, GRADIENT, GRAY, GRAYA, GROUP4, HALD, HDR, HEIC,...

The Social Dilemma

I thought I understood the general concepts and algorithms that companies like google, Facebook, twitter, etc. use but I was astounded about how much it impacts us as a society. The documentary, “The Social Dilemma”, on Netflix, is filled with conversations with many of the original architects of these systems and how monetization though ad targeting is driving behavior modification of billions of people worldwide.

The Social Dilemma also goes on to explain how our younger populations are being affected and correlates the dramatic increase in many conditions like anxiety are due the nature of keeping someone always engaged in a platform for monetary gain.

I already started getting off a number of social platforms, Facebook and Instagram being the latest – but now I’m really concerned about how being online is effecting my daughters.

What’s the answer? I don’t know but I can tell you that I am more willing than ever to pay for services that are not ad driven. I already have a pi-hole for ad blocking, and use cleanbrowsing.org for DNS filtering. But what do you do that when you use gmail? Use a iPhone or Google Android phone? Is it flip phone time again? I don’t know what to think really. And that’s a good thing.

What I can say is I would highly recommend the documentary.

https://www.thesocialdilemma.com/

https://www.humanetech.com/take-control

So long, Facebook, and Thanks for all the Fish …

Good Morning!
After not being active on Facebook for almost a year now I made the move to completely delete my account.  While it was surprisingly tough initially it was a great decision.  I realized all the ads and shaped content was not worth the family and friend connection I was actually seeking.  My account on Instagram will probably be deleted soon as well.  I’m getting ads and such on that platform as well.  It’s not surprising since Instagram is also owned by Facebook.

image.png

I’m available through more conventional, old school means, and I am slowly updating my web site so I can communicate on my own terms without pushing content on anyone.  I do have a means to share photos out for the family so if you’re interested let me know and I’ll send you a link to my own personal cloud share.

Thanks and I hope to hear from you sometime!

Password-less ssh in 2 Glorious Steps…

Local System – Let’s call it alpha
Remote System we don’t want to have to enter passwords for,
Let’s call it foxtrot

Prep: Harden your existing ssh keys since RSA 1024 sucks. This will create a new 4096 version – ed22519 is actually preferred so you can skip the rsa creation if preferred.

me@alpha$ mv ~/.ssh/id_rsa ~/.ssh/id_rsa_legacy
me@alpha$ mv ~/.ssh/id_rsa.pub ~/.ssh/id_rsa_legacy.pub

Step 1: Generate new keys:

me@alpha$ ssh-keygen -t rsa -b 4096 -o -a 100   #RSA version

me@alpha$ ssh-keygen -o -a 100 -t ed25519 #Preferred ed25519 version

Step 2: Copy the Ed25519  keys to the remote system called foxtrot:

me@alpha$ ssh-copy-id -i ~/.ssh/id_ed25519.pub me@foxtrot

If ssh-copy-id is not available (powershell, etc.) manually copy the public key to the other host:

me@alpha$ cat ~/.ssh/id_ed25519.pub | ssh me@foxtrot "cat >> ~/.ssh/authorized_keys"


DONE!
 Now verify you can actually ssh without a password:

me@alpha$ ssh me@foxtrot
me@foxtrot:~$ hostname
foxtrot
me@foxtrot:~$

You can also check your ~/.ssh/authorized_key file for duplicate or old entries, especially if you used old garbage RSA 1024 or less keys in the past.

Additional Reference: Manually copy the keys (This will ask you the password of the user you have mentioned):

me@alpha$ scp ~/.ssh/id_ed25519.pub me@foxtrot:~
me@alpha$ cat id_rsa.pub >> /home/user/.ssh/authorized_keys

Fancy way of doing the same thing (tee takes stdin and appends it to file):

me@alpha$ cat ~/.ssh/id_ed25519.pub | ssh jarvis tee -a ~/.ssh/authorized_keys

Wait… what about powershell? 

ssh-copy-id isn’t available so you can use the following:

$publicKey = Get-Content $env:USERPROFILE\.ssh\id_ed25519.pub
/authorized_keys"

ssh user@remotehost "mkdir -p ~/.ssh; echo '$publicKey' >> ~/.ssh/authorized_keys; chmod 700 ~/.ssh; chmod 600 ~/.ssh

Thanks to the following sites for easily explaining this process:
https://www.thegeekstuff.com/2008/11/3-steps-to-perform-ssh-login-without-password-using-ssh-keygen-ssh-copy-id/
https://blog.g3rt.nl/upgrade-your-ssh-keys.html
https://www.ionos.com/digitalguide/server/security/using-ssh-keys-for-your-network-connection/


HomeLab Build

Since I had a old windows laptop as a plex and file server for years I thought it would be good to try something new. After researching options I ddecided to try FreeNAS. Since it has ZFS and I’m an old Sun guy – why not. Well…. After a few weeks I decided to abandon FreeNAS and roll my own using a ThinkCentre M93p Tiny. I’ll try to post some notes on how the build goes.

Raspberry Pi backup using fsarchiver and other tricks

So I ran into a few issues using the dd image backup I referenced prior Raspberry Pi 3 SDCard backup

  1. The Image is very large even though the data was not.  For example on a 32GB SD card I was getting a 12GB file.  I only have 3GB of data! so that was a bummer.
  2. When it comes time to recover, I have to expand the gz image file to a full 32GB to then image it onto another SD device.  There’s tricks around this I’m sure but still.
  3. Since dd was reading 100% of the SD card (/dev/mmcblk0) even with compression it took a LONG time to create the image.  20 minutes or so.  Since I’m backing up a live system this was a real issue.

I did manage to figure out how to create a partial image if your partition sizes were smaller than the actual device – This seemed to work but it still was storing 6.6GB of data which was over double what I actually had:

Trimmed SD Image…

root@webpi:/mnt/usb# blockdev --getsize64 /dev/mmcblk0p1 /dev/mmcblk0p2
66060288
8929745920
root@webpi:/mnt/usb# echo `blockdev --getsize64 /dev/mmcblk0p1` `blockdev --getsize64 /dev/mmcblk0p2` + p | dc
8995806208
root@webpi:/mnt/usb# dd if=/dev/mmcblk0 conv=sync,noerror iflag=count_bytes count=8995806208 \
| gzip > /mnt/usb/webpi.trimmed.img.gz

Still not good enough….  Any I might have to tweak the count to make sure I’m not missing the last little piece of the lasat partition since we would have partition data in front of the partitions.

So…

To remedy a few issues,  I researched other ways to backup.  I came to the conclusion that fsarchiver was a decent fit.  Simple to use and only backs up data.  The downside was I would have to use another Linux system to reconstruct the SD card.  I can’t just blast a image write to a SD card and call it good.

Here are the steps.  Since fsarchiver doesn’t support vfat I had to make a dd image of the 66MB vfat boot partition.  Not a big deal.  The newer fsarchiver supports vfat;  I just didn’t want to install the packages need to do a full compile for the latest.

Benefits:  Much faster.  take 5 minutes total.  Much smaller data footprint – 3GB of data is storing in a  2.2GB image!
Downside:  Not one image – need to do some recovery with another Linux system with a SD card loaded.  Since I have a Pi setup for VPN and such that’s not a problem for me.

Disclaimer – I’m only posting this stuff to help me remember what I did and possibly help others that understand how to not shoot themselves in the foot.  Please be very careful in trying any of this stuff.  Depending on your situation it may not apply.

Raspberry Pi Backup using fsarchiver

  1. # Quiesce any major services that might write…
    service apache2 stop
    service mysql   stop
    service cron    stop
  2. # Save the Partition Table for good keeping…
    sfdisk -d /dev/mmcblk0 > /mnt/usb/webpi.backup.sfdisk-d_dev_mmcblk0.dump
  3. # Save the vfat boot partition
    dd if=/dev/mmcblk0p1 conv=sync,noerror | gzip > /mnt/usb/webpi.backup.dd_dev_mmcblk0p1.img.gz
  4. # Save the main OS image efficiently…
    fsarchiver savefs -A -j4 -o /mnt/usb/webpi.backup_dev_mmcblk0p2.fsa /dev/mmcblk0p2
  5. # Restart the services…
    service cron    start
    service mysql   start
    service apache2 start

Raspberry Pi Restore using fsarchiver

  1. # put a new SD card in a card reader and plugged it 
    # into a raspberry pi - showed up as /dev/sdb
  2. # Restore the partition table
    sfdisk /dev/sdb < /mnt/usb/webpi.backup.sfdisk-d_dev_mmcblk0.dump
  3. # Restore the vfat partition
    gunzip -c /mnt/usb/webpi.backup.dd_dev_mmcblk0p1.img.gz | dd of=/dev/sdb1 conv=sync,noerror
  4. # Run fsarchiver archinfo to verify you have a fsarchiver file and 
    # determine which partition you want to recover if you did multiple partitions
    fsarchiver archinfo /mnt/usb/webpi.backup_dev_mmcblk0p2.fsa 
    ====================== archive information ======================
    Archive type:                   filesystems
    Filesystems count:             1
    Archive id:                     5937792d
    Archive file format:           FsArCh_002
    Archive created with:           0.6.19
    Archive creation date:         2017-06-12_07-51-00
    Archive label:                 <none>
    Minimum fsarchiver version:     0.6.4.0
    Compression level:             3 (gzip level 6)
    Encryption algorithm:           none
    ===================== filesystem information ====================
    Filesystem id in archive:       0
    Filesystem format:             ext4
    Filesystem label:
    Filesystem uuid:               8a9074c8-46fe-4807-8dc9-8ab1cb959010
    Original device:               /dev/mmcblk0p2
    Original filesystem size:       7.84 GB (8423399424 bytes)
    Space used in filesystem:       3.37 GB (3613343744 bytes)
  5. # Run the restfs option for fsarchiver
    fsarchiver restfs /mnt/usb/webpi.backup_dev_mmcblk0p2.fsa id=0,dest=/dev/sdb2
    filesys.c#127,devcmp(): Warning: node for device [/dev/root] does not exist in /dev/
    Statistics for filesystem 0
    * files successfully processed:....regfiles=59379, directories=6999, symlinks=5774, hardlinks=331, specials=80
    * files with errors:...............regfiles=0, directories=0, symlinks=0, hardlinks=0, specials=0
  6. Run sync for warm fuzzies...
    #sync;sync;sync


Worked like a CHAMP!

Living on a Raspberry Pi!

This feels a little weird!

Playing with the overclocking and it really makes a difference!  The settings below look stable but make the proc very hot (over 85 degrees c.)

From /boot/config.txt:

# Overclock settings – disabled until heat sink is added. 170327 SeanK
#arm_freq=1350
#core_freq=500
#over_voltage=4
#disable_splash=1
##force_turbo=1
#boot_delay=1
#sdram_freq=500

Also created a script to put the governor in ondemand mode and put it in the init.d directory:  Continue reading Living on a Raspberry Pi!

Snipe heaven

Ah good times…  Below is from 2010!

Here’s some new details on snipes…
https://www.vogons.org/viewtopic.php?t=49073


I have 4 VM’s running MS-DOS and Netware.  Game On!

Instructions:

  1. Use a vnc viewer like TightVNC (realVNC didn’t work for me, only gave me a blank screen).
  2. Go to one of the following server wijgalt.homeip.net
  3. Connect to one of the ports, 5901 thought 5904
  4. If you already see activity on the screen, just exit and try another port.
  5. Go to drive G:
  6. Run nlsnipes
  7. If there’s a game already going it will tell you.  Just wait a bit and try again!

Enjoy!

Netgear Stora NAS


Warning:  Nerd Content ahead!

Since I work helping companies manage their enterprise storage environment, I tend to be very anal with storing my data at home.  It needs to be resilient, redundant, and fast. Why?  I’m retarded. Most of the time, I spend more than enough money on something I have to manage and tweak constantly.  No inexpensive NAS device has had all the features I wanted in an embedded device – until now.

A few weeks ago, I decided to try Netgear Stora, and I’m very impressed with it.  Firstly, it’s a 1TB NAS device for $200 bucks that performs.  I have a gig network at home, and Stora works very well with its 1gbit net interface.

It can support USB drives directly and will auto RAID1 if you install a second drive inside it, which was the main reason I tried it.

What’s so lovely is that it has a web interface for file manipulation that can be accessed easily from the internet. Who cares, right?  While the 1gbit network is fast, direct hard drive access is much faster.  Usually, a NAS device has a computer available to upload the data from other disks onto the NAS device.  With direct USB disk support and a web interface, I could migrate 700Gb of data much faster than having a computer as the middle man.  Since the Stora was doing the copying, I didn’t have to worry about network hiccups and file share weirdness with larger files.  Nice.

I just found out that while Netgear says the file system is propriety, I was able to mount the internal mirrored drive on my computer by mounting it as a XFS filesystem within a ubuntu VM instance.    AWESOME.   If the Stora dies, I can still get to my data.

Optional RAID1, Great Net Performance, USB Disk Support, Internet support, Media Server support for my PS3 – $200 bucks. Good times.

Here’s  a demo of it:

Best way to tether your iPhone – PDAnet

Unlike most apps that will provide a proxy web service to your computer through your iPhone PDAnet will provide a complete network solution for tethering your computer.  Basically, you can use your iPhone as a computer wifi device, without restriction.  While proxy apps will work well for web applications, it doesn’t work for stuff like email, ftp, ssh, etc. PDAnet can handle all network traffic.  I’m using my iPhone right now to access the internet from my Macbook Pro and it’s quite fast!  Check PDAnet out!

http://lifehacker.com/5086490/the-best-way-to-tether-your-iphone-to-your-laptop-for-free

Old fashion “Open Folder” Icon in the Dock

apple-imageWhile the newer versions of OS X have been great and the dock has matured, I hated one thing.  Sometimes I just want to put a directory on the dock without it doing it’s crazy effect stuff to it like Fan, Grid, List, etc.  Many times all I want is a dock icon that will just open a directory in finder.  Fortunately, I figured out how to do this!!!

Create a link to the directory of your choice on the desktop.  For instance, I created a link (By holding down the “option”, “apple/command” keys down) of my home directory on my desktop.  Now, drag that link to the dock.  Bingo! I have a dock icon that will just open a finder window of my home directory.